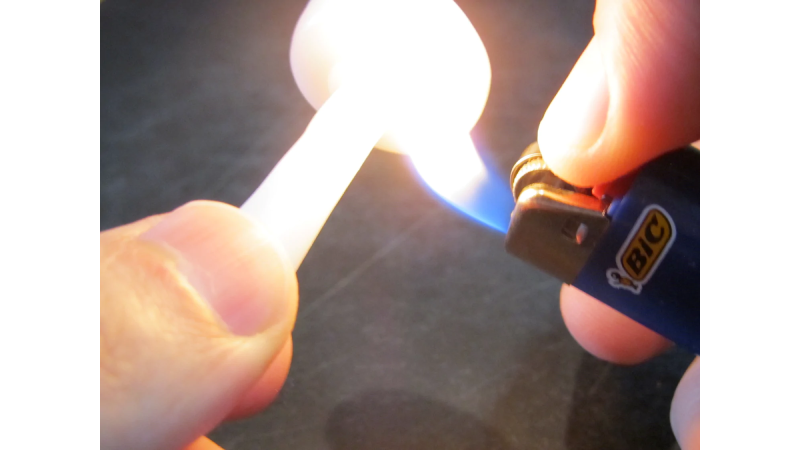
There are many different ways to connect two pieces of InstaMorph together. We already covered how to use hot water to accomplish a strong bond, but we understand that process can be a little unwieldy for small pieces. That’s why we’ll now show you how to take a small lighter to do more intricate work with InstaMorph.
First, you’ll need a lighter. You can pick one of these up at any corner drug store for around a dollar, or use one of those fancier ones with the long handles for lighting your barbecue.
WARNING: Whichever instrument you choose, reduce the flame to shortest possible size to reduce the chance of burning your fingers. Also, If you are using a small lighter like the one pictured, remember that the metal nozzle near your finger will heat up with prolonged use. Use the lighter only for short periods and let it cool down completely to avoid burning your thumb. Ok, that’s the safety speech.

Select the pieces you want to connect together. It is usually easier to bond the smaller of the two to the larger. First, heat up the larger piece’s surface with the lighter to achieve a slightly moldable surface. Then, on the smaller piece, run the bonding location under the flame until it turns clear. Depending on the fuel in the lighter and where the piece is placed in the flame, a small amount of “soot” may collect on the surface, turning the plastic a tinge of gray or black. This is normal and will not affect the bonding strength. For most connections, this color also doesn’t show through the finished product (see pictures).


After the piece has been heated, push the two pieces together and let cool. There you go, another successful InstaMorph bond.
On some connections, there will be a small ring like the one in the pictures above. This can be smoothed out by going back over it with the lighter and then smoothing out the ring with your finger or other tool.


This technique works really well for small, intricate pieces of InstaMorph. Try it out on your next project.


